C++ 多线程
1. 使用原因
1.任务分解:耗时任务,任务分解,实时响应
2.数据分解:充分利用多核心CPU
3.数据流分流
2.核心概念
1.std::thread 基础
join():主线程等待阻塞子线程完成后,回收子线程资源,线程生命周期受控;
detach(): 子线程与主线程分离,子线程后台游离运行。主线程销毁后,子线程会强行销毁。如果访问y
1 |
|
2.Mutex & RAII 锁
mutex (互斥量)类型:允许多个线程安全访问变量
1 | lock() try_lock() unlock() |
mutex
recursive_mutex :用来解决递归调用lock_guard(mtx)
1
2
3
4
5
6
7
8
9
10
11
12
13
14
15
16class DoSomething{
public:
int fun1(){
std::lock_guard lock(mtx);
count*=2;
fun2();
return count;
}
int fun2(){
std::lock_guard lock(mtx);
count++;
}
private:
recursive_mutex mtx;//如果是mutex 会阻塞主线程
int count = 0;
}
timed_mutex:
1
2
3
4
5
6
7
8
9
10
11
12
13
14
15
16
17
18
19
20
21
22
23
24
25
26
27
28
29
30
31
32
33
34
35
36
37
38
39
40
41
42
43class TryDemo
{
public:
void print() {
for (int i = 0; i < 10; i++)
{
//
auto deadline = std::chrono::steady_clock::now() + std::chrono::milliseconds(100);
unique_lock<timed_mutex> lock(m_mutex, defer_lock);
if (lock.try_lock_for(100ms)) {
{
std::lock_guard guard(cout_mutex);
cout << "[" << this_thread::get_id() << "]" << "成功;\n";
}
this_thread::sleep_for(100ms);
}
else {
lock_guard guard(cout_mutex);
cout << "[" << this_thread::get_id() << "]" << "失败;\n";
this_thread::sleep_for(100ms);
}
}
}
private:
timed_mutex m_mutex;
mutex cout_mutex;
int m_count = 0;
};
int main(void)
{
TryDemo demo;
auto print = [](TryDemo& demo)
{demo.print(); };
thread t1(print, ref(demo));
thread t2(print, ref(demo));
t1.join();
t2.join();
}lock try_lock try_lock_for try_lock_until unlock
shared
1.如果只是用mutex会忘记没有解锁,2出现异常也不会解锁。导致永久阻塞所以引进
引入锁包装:
- lock_guard; 相当通过RAII 将mutex 的lock() 和unlock() 封装了,离开作用域后析构函数调用unlock()
1 | template <typename Mutex> |
- unique_lock:相比lock_guard 更加灵活,可以实现延迟加锁或者超时的加锁。
lock() try_lock try_lock_for try_lock_until(计时锁) unlock
- scoped_lock;
死锁预防
- lock()同时锁多个
- std::lock_guard顺序
3.Condition Variable
4.Condition Variable
5. autmic & Memory
6. Lock-Free 数据结构
7.Future/Promise/Async
8.ThreadPool & JobSystem
9.游戏引擎多线程模式
本博客所有文章除特别声明外,均采用 CC BY-NC-SA 4.0 许可协议。转载请注明来源 Never Settle!
相关推荐
2026-04-20
C++ 多线程理解
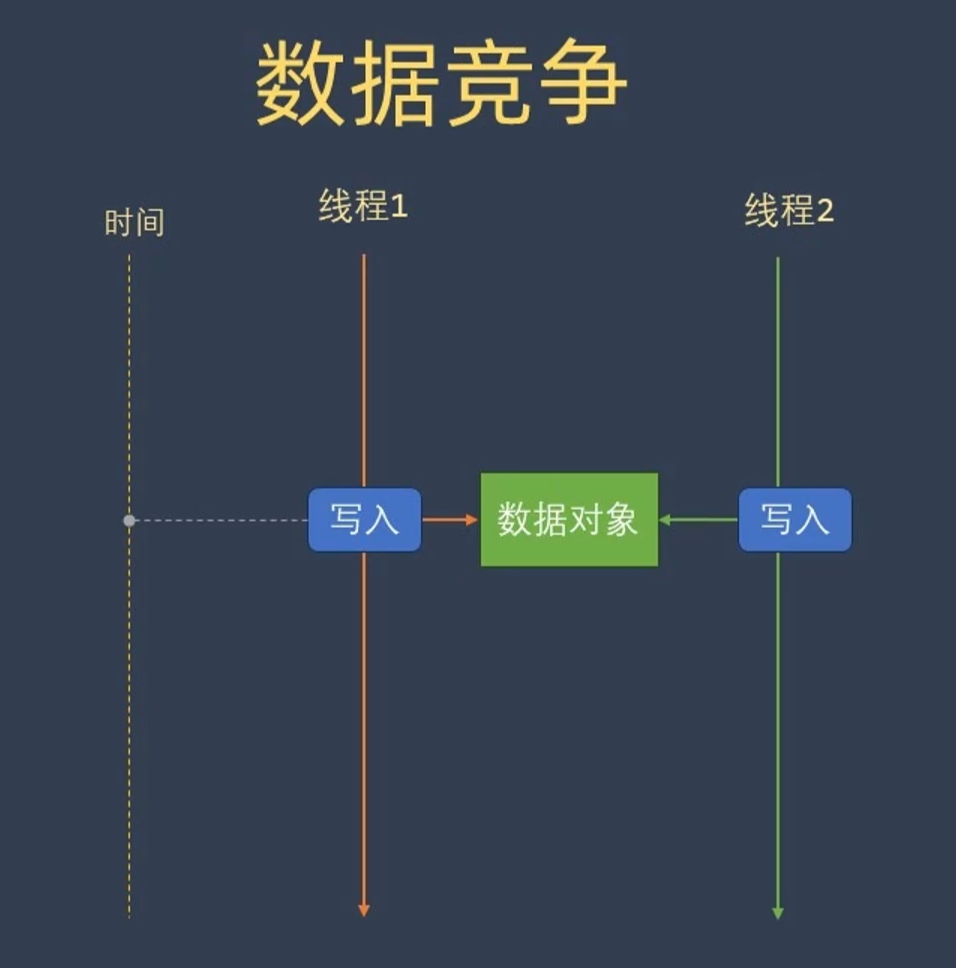
Why:为啥有多线程?提高 CPU 的利用率。 What:多线程是什么?How:多线程怎么实现?有什么问题?线程安全问题死锁问题 线程饥饿问题
2026-04-29
Windows 下 VS Code + MSYS2 MinGW C++ 环境搭建笔记
概述这份文档记录当前项目的 C++ 开发环境配置。目标是:在 VS Code 中按 F5 自动完成编译、生成、启动调试。 当前方案使用: 编译器:MSYS2 MinGW g++.exe 调试器:MSYS2 MinGW gdb.exe 编辑器:Visual Studio Code 代码提示:clangd 构建输出目录:build 需要安装什么 安装 VS Code。 安装 MSYS2。https://www.msys2.org/ 当前路径是: 1C:\msys64 在 MSYS2 里安装 MinGW 编译工具链。 打开 MSYS2 MinGW x64 终端,执行: 12pacman -Syupacman -S --needed mingw-w64-x86_64-gcc mingw-w64-x86_64-gdb 确认编译器和调试器存在: 12C:\msys64\mingw64\bin\g++.exeC:\msys64\mingw64\bin\gdb.exe VS Code 建议安装这些扩展: C/C++,扩展...
2026-05-05
C++ 基础
1. override 和 final 限定符override:编译器帮忙检查,用于父子类对父类 override 函数被实现,避免出现 override 函数调用失败。 final:加到父类函数后避免在子函数中被 override;加到类名后,类就无法被继承。 2. 静态成员 staticstatic 变量不依赖任何一个类对象,单独存在,单独初始化。 static function:只能访问静态成员。non static 变量依赖类的实例化而存在的,要想访问需要在函数里先创建对象,再访问变量。 3. const 成员函数4. this 指针5. 访问父类中的函数6. 友元函数与类
评论